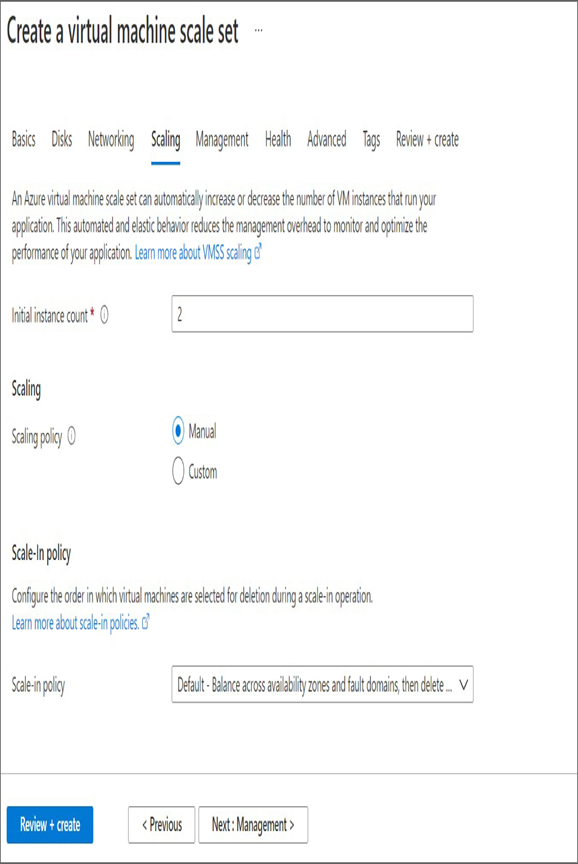
As you move to the next tab, Disks, you will be able to configure the disk type and encryption of the disk. This tab is the same as that of a virtual machine. Clicking Next will take you to the Networking tab, where you need to specify the virtual network, subnet, and load balancer (if you have one). The next tab is Scaling (refer to Figure 7.11), which is not something you have seen in virtual machines. On this tab, you will be able to define the scaling rules. You can describe the initial instance count, the scaling policy, and the scale-in policy. As of now, you will set the scaling policy to Manual, and you will learn about custom scaling policies in the next section.

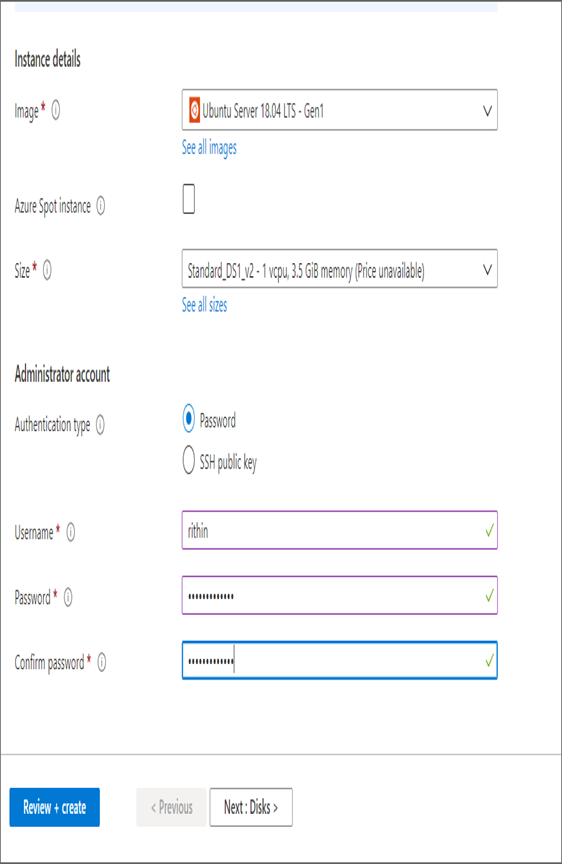
FIGURE 7.10 Creating a scale set, Basics tab

FIGURE 7.11 Creating a scale set, Scaling tab
The next tab is Management; the options are like that of virtual machines. Going forward, you will see the Health tab where you can configure application health monitoring. Here you will be able to set up a health probe on a TCP port and check if the application is responding. The health of the instances is decided based on the response code from the instances. This process is similar to load balancing health probes.
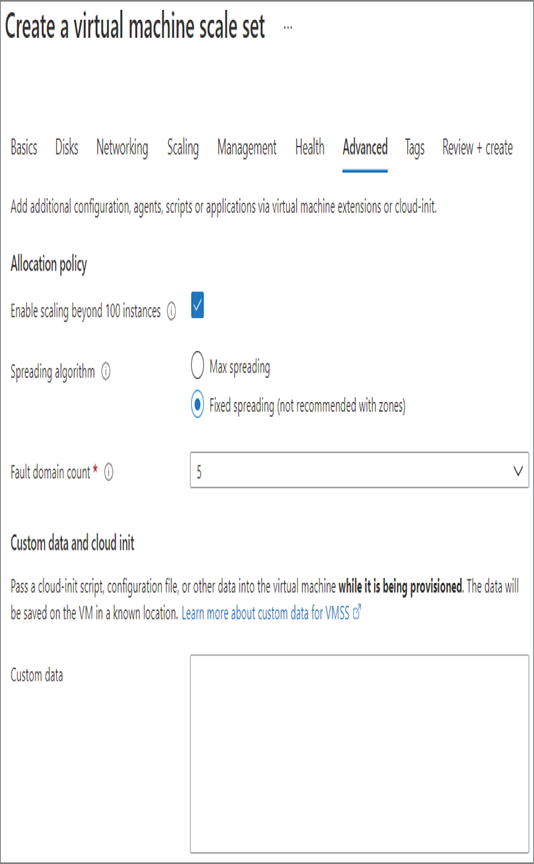
As you move on, the next tab is Advanced (refer to Figure 7.12). Here you will have advanced configuration such as enabling scaling beyond 100 instances, spreading algorithm, and fault domain count. If you check the Enable Scaling Beyond 100 Instances option, then only the scale set will scale beyond 100 instances. The spreading algorithm decides how the instances are spread across fault domains.

FIGURE 7.12 Creating a scale set, Advanced tab
You can create the virtual machine scale set after the validation. Though we have talked about all the options, let’s quickly run through the main options or parameters that are important in the creation of VMSS:
- Initial instance count: When the VMSS is created, this will be the initial instance count in the scale set. The value can be 0 to 1000.
- Instance size: Define the size of the instance in the scale set.
- Azure Spot instance: These are low-priority VMs that are allocated from Azure’s excess capacity in the region. Using spot instances can reduce the cost of instances rather than running them as regular instances.
- Enable scaling beyond 100 instances: As mentioned earlier, this acts as a billing barrier to stop the scaling at 100 instances. If enabled, the scaling can go all the way up to 1,000 instances and 600 instances for custom images.
- Scaling policy: This can be Manual or Custom. Custom is used to set up autoscaling.
- Spreading algorithm: This determines how the instances should be spread across fault domains. Microsoft recommends using max spreading to spread the instances across all fault domains.
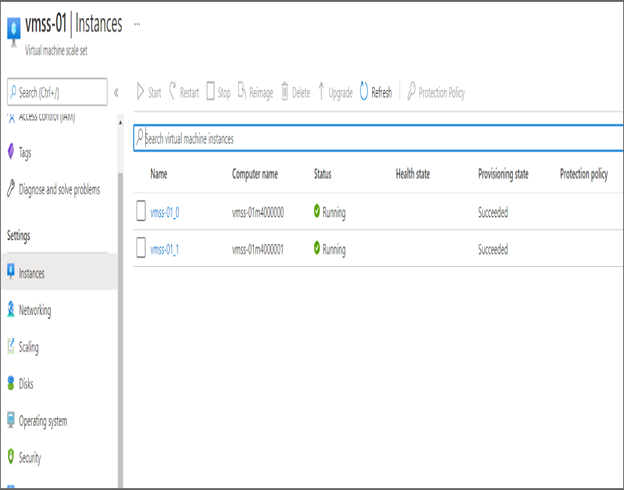
Once the scale set is created, you will be able to see the instances on the Instances blade (refer to Figure 7.13). Since you created the initial instance count with two, you have two instances in the scale set. This is the default value.

FIGURE 7.13 Instances in scale set
Now that you know how to create a scale set, let’s see how you can set up autoscaling to deal with the unexpected load.