For downloading the template from the Azure portal, you need to navigate to the resource group where you have deployed the resource. You can follow these steps:
- Log in to the Azure portal and navigate to the resource group.
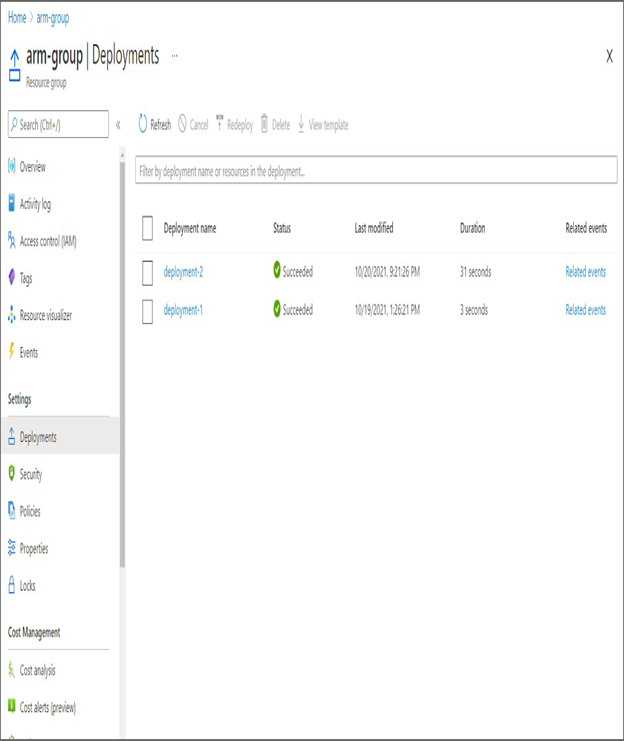
- Open the Deployments blade, and you will be able to see all the deployments made in the selected resource group (refer to Figure 8.17).
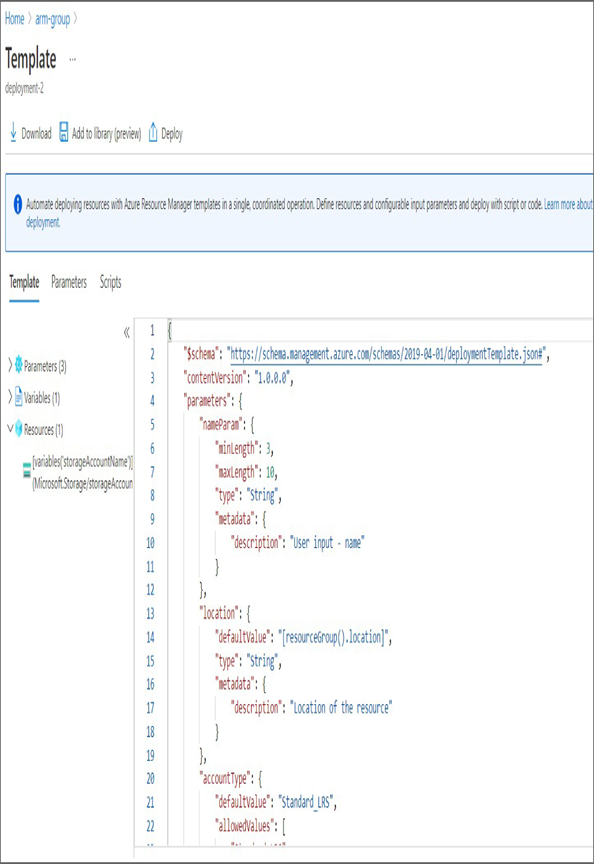
- Select the deployment that you need to view the template for and click View Template.
- The template will be shown to you, and you can click Download to download the template (refer to Figure 8.18).

FIGURE 8.17 Listing resource group deployments

FIGURE 8.18 Downloading template
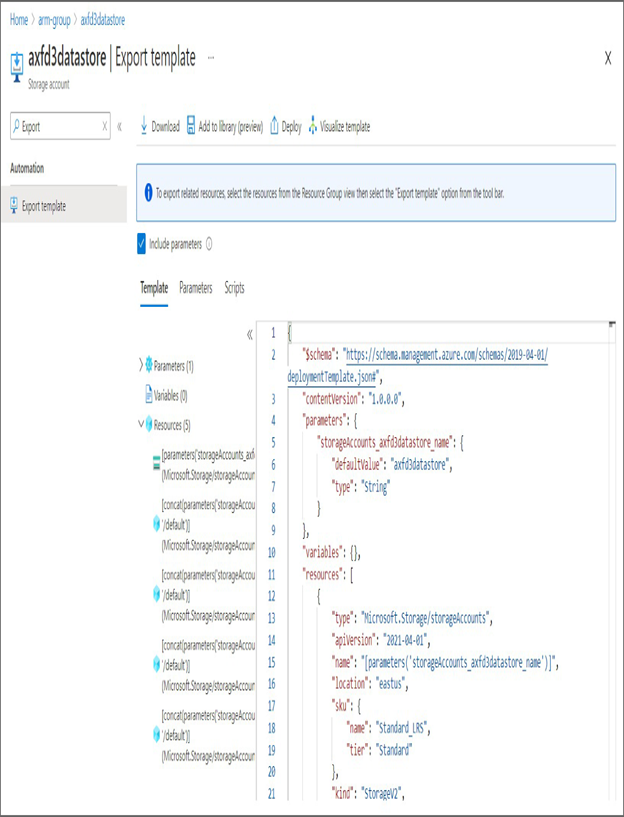
Let’s say you are not able to find the right deployment as you don’t remember the name of the deployment. You can always export by navigating the resource and use the Export Template options, as shown in Figure 8.19.

FIGURE 8.19 Export Template option
You have seen how you can export the template of a resource group or resource using Azure PowerShell, the Azure CLI, and the Azure portal. Next, you will see how you can create a virtual hard disk template to bring custom VM images to Azure.
Configuring Virtual Hard Disk Templates
In on-premises, whenever you create VMs, we used to follow the regular OS installation process. But in the cloud, you simply provide the username and password during the deployment; once the VM is deployed, you can use it with the username and password you provided during the deployment. If you have noticed, whenever you create a virtual machine in Azure, instead of the OS, you select the option image to select what OS you need. The image comprises the operating system (OS) and other preconfigured software.
Azure will be using this image to create the virtual hard disk. When you start our VM, the VM boots from this virtual hard disk. Further, you can install additional software on this VM per your requirements. When it comes to images, there are Microsoft-endorsed images, and there is a plethora of images available in Azure Marketplace.
In Azure Marketplace, different publishers publish their customized images so that you can directly use them without the need for further configuration. For example, if you need to host a WordPress site, then you need to create a Linux machine and install the WordPress package, MySQL, Apache, and PHP. Instead of going through this hassle of installation and configuration, you can directly use any WordPress images available in the Azure Marketplace.
Let’s say you are not able to find an image that matches your requirements or organization’s standards in Azure Marketplace; then you can bring your own image into Azure and create VMs. Every image in Azure is a preconfigured version of a particular operating system. Before we discuss the deployment of VM from VHD, you need to understand the difference between a generalized image and a specialized image.
- Generalized image: You can create custom images by generalizing a virtual machine. You can build an image either using Hyper-V or using an Azure VM. Once the VM is ready, you will install the required software. After configuring the VM, you can create a generalized image of the VM. During this process, user accounts, passwords, and the hostname will be erased from the VM. However, the packages that are installed will be retained.
- Specialized virtual image: This is a copy of a live virtual machine. Usually, these images are created when you reach a specific state and are used as a recovery point. During the process, the user account, passwords, hostname, and configuration will be retained in the final image produced.
Now we will discuss how you can create an image of a VM in Azure using the Azure portal.